LOTS OF LITTLE LINES
For those who’ve forgotten, what is known as “IVR” are those projects where VO talent record telephone prompts that tell you to please press “1” for sales and “2” for technical support, after that they often make you wait indefinitely, despite the fact that “your call is important to us.” More common today are the jobs that consist of narrating e-learning videos and slideshows, but the process is very much the same.
As you might expect, these projects often involve recording hundreds of lines; at times the number runs into the thousands. It’s far from glamorous, but it’s usually nice work if one can get it, and I have several commercial- and animation-oriented VO friends who do IVR and e-learning when it’s available.
Incidentally, Wells Park bills itself as a communications consultancy, specializing in everything from e-mail newsletters, marketing communications, and website content, to radio, online, and telephone audio production. Based on the latter, the company must have enough of that business for it to make sense to create a tool for itself, while exploring the possibility of selling it to others. The object is to record, precisely and intelligibly, a very large number of lines in a short period of time, which are then saved as files with specific names. How well does PromptBuddy stand up to the existing products? Let’s find out.
INSTALLATION AND FIRST RUN
The first thing one needs to know about PromptBuddy is that it is strictly a Windows-only product, and a thrifty one at that. It is been tested on Windows XP, Vista, and Windows 7. During my evaluation, I ran it on everything from an Intel i5 powerhouse to a 1.2 GHz Pentium 4, and it worked well in all cases. Don’t tell anyone, but I even managed to run it under Parallels on a Macintosh, albeit one with 8 Gigabytes of RAM just to be sure, but more about that later. The program itself is quite small and occupies but a few hundred megabytes of hard drive space.
PromptBuddy also relies entirely upon the capabilities of your computer running Windows, so the maximum sample rate and bit depth available is not even controllable from within the program. If you use the native sound input and output within Windows, then you’ll need to configure the appropriate Windows control panel to set that up. Likewise, if you use an external audio interface, that will also have to be set up via Windows’ control panel.
Once you’ve downloaded the PromptBuddy software from the Wells Park website, you’re basically ready to go. The company suggests that the application can easily live directly on your desktop. Double-click the application and off you go.
The first screen you’ll see allows you to try out PromptBuddy for seven days, during which the program will run in a fully functional manner. Just click the Try Me button and you’re in. Should you later choose to buy the program, there’s also a Buy Me button on that screen, along with a tab at the top that will allow you to register the program once you’ve received a valid registration number from Wells Park. At first I thought that seven days would be a little bit short to fully explore an audio recording and editing program. Please trust me when I tell you that you will probably know whether or not PromptBuddy is for you within the first hour -- it’s that simple.
THIS... IS... SPARTAN!
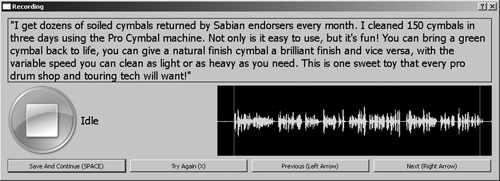
Once you’re in, it’s time to deal with the user interface. PromptBuddy’s interface is beyond sparse. It consists of exactly three windows: one labeled Audio Production Widget that allows you to import the script, another labeled Recording for navigating the actual recording process, and a third for settings labeled Dialog, which you’ll visit from time to time.
The first window, Widget, is where you will load the script, which must be a text file. Clicking the Browse button on the right opens up a standard Windows Open dialog box, where you locate and choose your script. The script name and its full path will then appear in the Script File box back in the Widget window.
On the left-hand side of Widget you’ll find a Settings button, which will open the Dialog window. This has exactly two functions: first, another Browse button takes you to a Windows navigation dialog that allows you to select a folder for storing your finished audio files. It should be noted that this is not a standard Windows Open dialog box, in that while you can create a new folder there, you cannot give that new folder any name other than the default New Folder. Since it’s more than likely that you’ll want your folder full of finished files to have a name that includes the actual name of the project on which are working, my recommendation would be that you take a brief trip back to the Desktop and create an appropriate folder, with an appropriate name, there.
The Silence Threshold setting is an important one. It governs the audio level at which the automatic topping and tailing function works. Unfortunately this threshold is calibrated in percent of the maximum input level, so it can be somewhat difficult to find a setting which will trim silence at the beginning and the end of the audio file without cutting off important sounds, like the “t” in “don’t”. The screen suggests, “it should probably be less than 10% to trim silence.” But that depends upon the input level of your microphone signal; if your microphone signal is relatively low, then 10% may cut into the actual line read. There is a fair amount of trial and error to be done here. I began my experimentation at 5%, and ultimately settled at 3% since the level of my USB microphone was a bit low. You’ll just have to try it.

